Last updated: July 2026
A good RCC pipe is only half the job. Most pipe failures we hear about from sites across Karnataka have nothing to do with the pipe itself — they come from rough unloading, poor bedding, unfilled haunches or a loaded truck crossing a half-backfilled trench. This RCC pipe installation guide walks through the full hume pipe laying procedure the way an experienced supervisor would run it, so your culvert or drainage line performs for decades.
Step 1: Pre-checks at Delivery
Inspect every consignment before the truck leaves. Once the vehicle is gone, disputes become difficult. Check:
- Count and sizes — tally pipe quantity, diameters and effective lengths against the delivery challan and your order.
- Class markings — confirm the class marked on the pipes (NP2 light-duty or NP3 medium-duty, non-pressure) matches what the drawing calls for. Do not accept a lower class than specified.
- Cracks and damage — look along the barrel for longitudinal or circumferential cracks, spalled patches and exposed reinforcement. Tap-test doubtful pipes; a clear ring suggests sound concrete, a dull thud can indicate a hidden crack.
- Ends — spigot and socket faces (or plain ends for collar-jointed pipes) must be clean, square and free of chips. A damaged jointing surface means a leaking joint later.
- Collars and rubber rings — if supplied, count them separately and check rings for cuts or perishing.
Mark rejected pipes clearly with paint and set them aside so they never wander into the trench.
Step 2: Handling & Unloading Safely
RCC pipes are strong in the ground but brittle against impact. The single most damaging thing that happens on sites is dropping pipes off the truck bed.
- Never drop or dump pipes — not even onto sand heaps or old tyres "to break the fall".
- Use a crane, excavator or chain block with slings or chains passed through the barrel or around it with padding (gunny bags, rubber strips) at contact points. Bare chains chip edges and crack sockets.
- For smaller diameters without lifting plant, roll pipes down an inclined ramp of sturdy planks, controlled with ropes — one pipe at a time, never freewheeling.
- Roll pipes on level, firm ground only; keep them clear of trench edges and slopes, and chock stored pipes with wedges so they cannot roll.
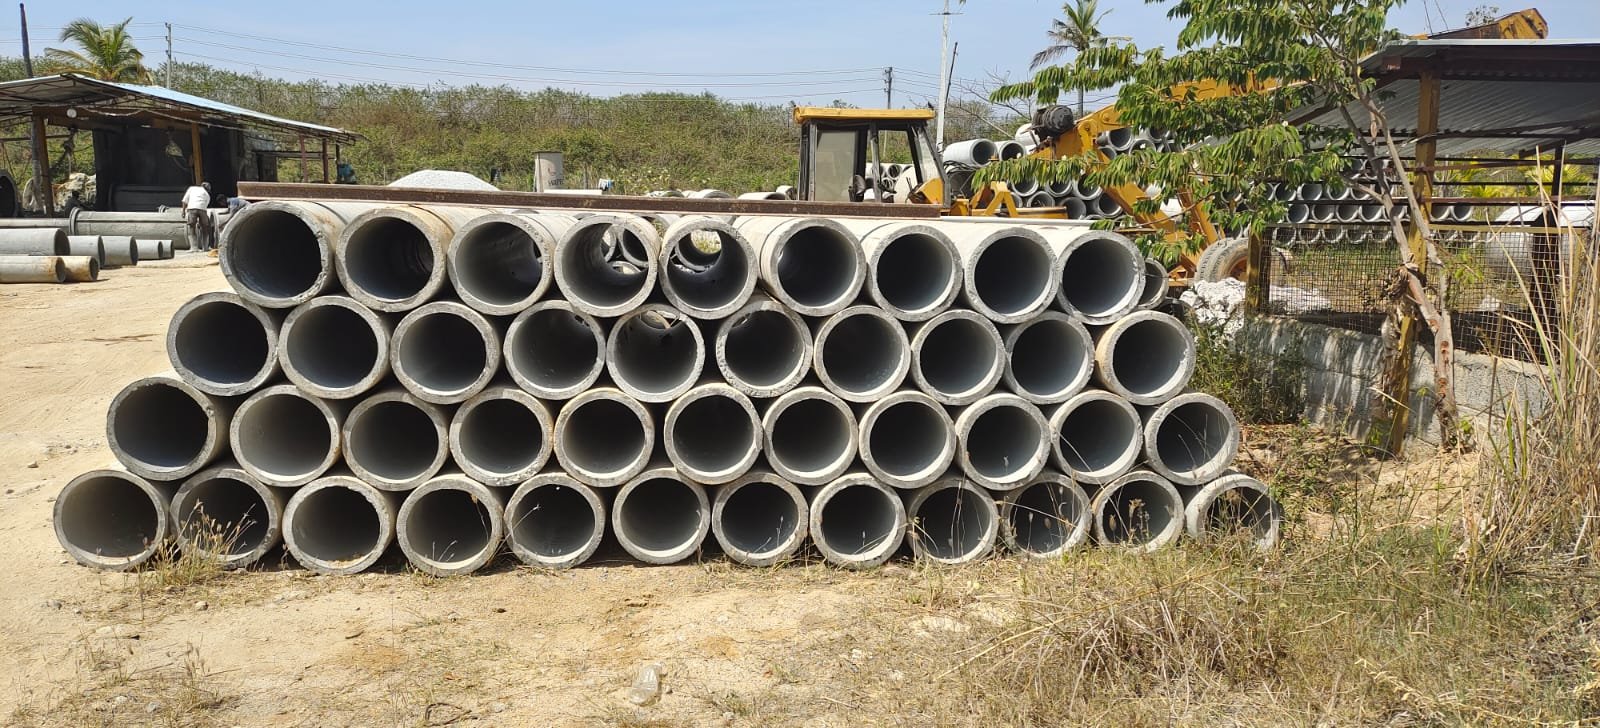
- Stack in low, stable tiers with timber battens between layers; keep sockets alternating ends so they do not carry stacking load.
- String pipes out along the trench line on the side opposite the excavated soil, close to their final position, to minimise re-handling.
Step 3: Trench Width, Depth & Grade
The trench should be as narrow as safely workable — a wider trench puts more backfill load on the pipe, not less. Useful rules of thumb:
| Item | Rule of thumb (good practice) |
|---|---|
| Trench width | Pipe outside diameter (OD) + working space on each side for a man to compact the haunches — typically around 300 mm per side for common sizes; the engineer's specified width governs |
| Depth | Invert level as per drawing, plus bedding thickness below the pipe barrel |
| Grade | Excavate to a uniform slope towards the outfall — check with boning rods, level or laser; never lay to "eye level" |
| Trench bottom | Firm, undisturbed soil, trimmed even; remove soft spots and replace with compacted granular fill |
| Socket recesses | Scoop small joint holes under each socket/collar position so the barrel — not the joint — carries the pipe |
Keep excavated soil at least half a metre back from the trench edge, shore deep trenches as required, and dewater before laying — pipes should never be jointed in standing water.
Step 4: Bedding Types
Bedding spreads the load from the pipe into the ground. Laying a pipe on a raw trench bottom concentrates load on high spots and stones, which is how barrels crack under traffic. Two common approaches, conceptually:
Granular bedding
A layer of compacted sand, gravel or crushed stone fines placed on the trimmed trench bottom and shaped to cradle the lower part of the barrel. Suitable for most drainage and irrigation lines with adequate cover and normal soils. Thickness and grading are as per the project specification.
Concrete cradle bedding
The pipe is set on a plain or reinforced concrete cradle cast to embrace the lower portion of the barrel. Generally specified where cover is shallow, traffic is heavy, soils are weak or waterlogged, or the drawing calls for a higher bedding class — typical for road culverts and cross drains. The cradle must cure before jointing loads are applied.
Whichever bedding is used, the aim is the same: uniform support along the full barrel length, with the pipe never resting on its sockets or on hard points.
Step 5: Laying Direction & Alignment
- Start laying at the downstream (outfall) end and work upstream.
- Lay pipes with the socket (or collar) facing upstream, so each new spigot enters the socket of the pipe already laid and water flows over — not into — the joint.
- Check line and level on every pipe with sight rails and boning rods or a level instrument before jointing. Correcting alignment after three pipes are jointed is miserable work.
- Pull pipes home gently with a chain block or lever arrangement — never ram them with the excavator bucket.
Step 6: Jointing
Collar joint (cement mortar method)
Both pipe ends are plain; a precast concrete collar is centred over the junction. Butt the pipe ends closely with the specified gap, centre the collar so it laps both pipes equally, then caulk the annular gap with stiff cement mortar (rich mix as per specification), packed hard from both sides and finished with a neat fillet outside. Where the drawing permits, bitumen mastic may be used in place of mortar as per IS 458 practice.
Curing the joints matters as much as making them. Keep mortar joints continuously damp — wet gunny bags or sprinkling — for at least 7 days as good practice, and do not test, flood or backfill over uncured joints.
Spigot & socket joint (rubber ring)
This flexible joint suits lines needing water-tightness or slight settlement tolerance. Clean the socket and spigot thoroughly, seat the correct-size rubber ring squarely on the spigot without twists, apply the recommended lubricant (never grease or used oil, which attack rubber), then draw the spigot home in one steady pull. Check with a feeler gauge that the ring sits evenly all round. No curing period is needed, but confirm the ring has not rolled or pinched before backfilling.
Step 7: Haunching & Initial Backfill
This is where lines are made or broken. The haunches — the wedge-shaped zones under the sides of the barrel — must be packed by hand with selected fine material, rammed in thin layers so there are no voids under the pipe. An excavator cannot do this; a man with a wooden rammer can.
- Use selected soil or granular material free of boulders, hard clods, roots and rubbish for the pipe zone.
- Place and compact in layers of roughly 150 mm, equally on both sides of the pipe so it is not pushed off line.
- Continue hand compaction until fill reaches at least 300 mm above the pipe crown. No mechanical rammers or plate compactors directly over the pipe within this zone.
- Leave joints exposed until any specified water test or engineer's joint inspection is done, then complete the fill over them.
Step 8: Final Backfill & Opening to Traffic
Above the 300 mm crown cushion, backfill in compacted layers with approved material up to formation level. Light mechanical compaction may be used above the cushion zone as the engineer permits. Crown the surface slightly to allow for settlement on unpaved routes.
When can pipes take traffic? Only when all three are true: joints are fully cured, backfill is compacted in layers to the full design cover shown on the drawing, and the engineer has cleared the crossing. Until then, barricade the line — a single loaded tipper crossing shallow, loose fill can crack a pipe that would otherwise have lasted fifty years. For culverts under regular traffic, remember class selection matters too: see our culvert pipe selection guide.
Common Site Mistakes to Avoid
- Dropping pipes from the truck instead of lowering or ramp-rolling them.
- Laying on an untrimmed trench bottom with stones bearing on the barrel.
- Sockets facing downstream, letting flow drive into every joint.
- Pipes bearing on their sockets because joint holes were not scooped out.
- Skipping haunch compaction — voids under the pipe are invisible but fatal.
- Boulder-laden backfill dumped straight onto the crown.
- Machine-compacting directly over the pipe with less than 300 mm cover.
- Traffic allowed over the line before backfill and curing are complete.
- Mortar joints left to dry out in the sun instead of being cured.
- Using a lower pipe class than specified "because it was available".
Printable Site Checklist
| Stage | Check | Done |
|---|---|---|
| Delivery | Count, class markings, crack/end inspection, collars & rings tallied | ☐ |
| Handling | Padded slings used; no pipe dropped; pipes chocked in storage | ☐ |
| Trench | Width per spec; bottom firm & trimmed; grade checked to outfall; dewatered | ☐ |
| Bedding | Granular bedding or concrete cradle as per drawing; joint holes scooped | ☐ |
| Laying | Sockets upstream; line & level checked pipe by pipe | ☐ |
| Jointing | Mortar packed & cured 7 days / rubber ring seated & gauged | ☐ |
| Haunching | Hand-compacted 150 mm layers, both sides, to 300 mm above crown | ☐ |
| Final backfill | Layered compaction to formation; no boulders; surface crowned | ☐ |
| Traffic | Full cover achieved; joints cured; engineer's clearance taken | ☐ |
Frequently Asked Questions
How soon after laying can vehicles cross an RCC pipe culvert?
Only after joints have cured, backfill is compacted in layers to the full design cover, and the engineer has approved the cover depth. Most crushed pipes on site are crushed by premature traffic over loose fill, not by a defective pipe.
Which side should the socket face when laying RCC pipes?
Sockets or collars face upstream, and laying proceeds from the downstream end towards upstream. Each new spigot then enters the socket of the pipe already laid, and flow passes over the joint rather than into it.
How long should collar joint mortar be cured?
Keep the mortar continuously moist for at least 7 days as good practice — wet gunny bags or regular sprinkling — and keep the line unloaded and dry during this period. Rubber-ring joints need no curing, only a seating check.
What bedding is needed under RCC hume pipes?
Compacted granular bedding shaped to the barrel suits most drainage lines with normal cover. Concrete cradle bedding is generally specified for shallow cover, heavy traffic or weak soils. The bedding class on your project drawing always governs.
Need RCC pipes for your project?
Factory-direct prices from our Kunigal & Tiptur units — NP2 & NP3 spun pipes, 300 mm to 1600 mm, manufactured as per IS 458:2021. Serving all of Karnataka since 1998.
📞 7760337303💬 WhatsApp UsRelated Guides
- NP2 vs NP3 Pipes — which class your drainage or culvert job actually needs, explained simply.
- Culvert Pipe Selection Guide — choosing diameter and class for cross drains and road culverts.
- IS 458 Standard Explained — joints, classes and tests under IS 458:2021 in plain language.
- RCC Pipe Price Guide — indicative price ranges by diameter and class, and what drives them.